For the month of January, I decided to try making a pair of jeans. I have the McCall's jeans pattern, number 5894, in size 18 and up. In ready-to-wear jeans I'm a size 12 or 14. But I bought the pattern based on my hip size, and that's what it came up with. I started by making a muslin out of muslin. I was sure I'd need to make the waist bigger than the pattern said, as my waist measurement is about the same as my hip measurement, but it turned out that I had to take in quite a bit on the side seams.

Then I had to try to figure out what to do with the 'smile' lines in the crotch area. It turned out that the problem was that my thighs are fatter than the pattern allows for, so I needed to let out the inner seams.

Then I had to try to figure out what to do with the 'smile' lines in the crotch area. It turned out that the problem was that my thighs are fatter than the pattern allows for, so I needed to let out the inner seams.


Josie helped me figure out the fitting issues. No, she's not a fitting expert, but she was willing to help me pin and unpin, and take pictures of the pants on me.
It took me another week or two to get to sewing my actual denim fabric, but when I did I had fun with the front pockets. I decided to use a pretty yellow daisy print for the lining inside (our little secret, k?), and use yellow thread for the topstitching. I didn't go buy special topstitching thread; I just used what I have.


It took another day or two to get the zipper and fly installed. The instructions that came with the pattern were clear enough, but after making the muslin I realized that they had the zipper opening on the left, like women's pants do, and I knew I wanted it on the right, like men's pants. I found a great sew-along on Peter Lappin's blog, Male Pattern Boldness, that helped me tremendously.

 |
| A better glimpse of my pretty lining fabrtic |
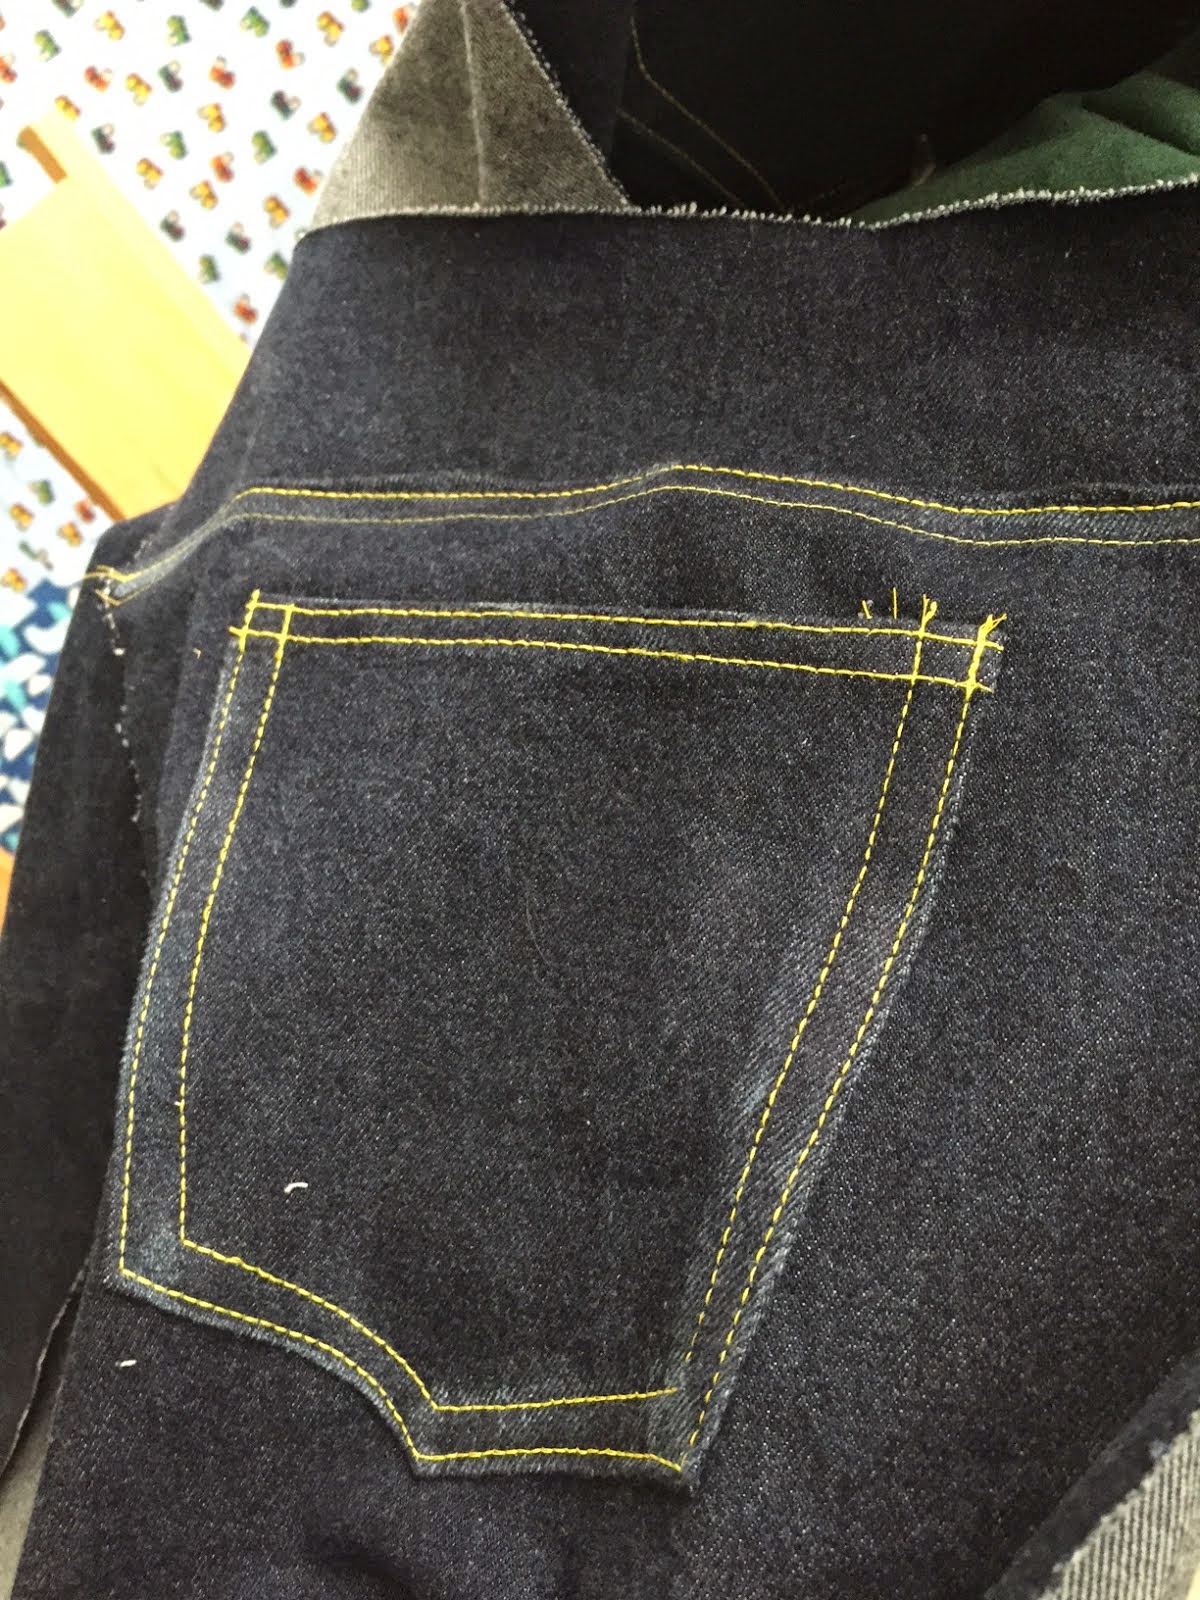
One of the things I learned from Peter's blog is that it's okay to sew the jeans in stages, i.e., the front pockets one day and the zipper and fly another day, etc. In other words, I didn't have to do it all in one day. During that time I took some time to watch Angela Wolf's Craftsy class about altering store-bought clothes. In there she talks about hemming jeans, and she mentions that you can actually thread your needle with more than one spool of thread--as long as you have a separate spool for each one. So I set up my sewing machine with two spools of yellow thread, in order to make the topstitching a little more pronounced, and I liked the results.

On the left, below, you see the double-thread topstitching, and on the right is the single thread topstitching that I had already done.

So the front of my pants is single-thread topstitched, and the back is double-thread topstitched. That's okay.
On the left, below, you see the double-thread topstitching, and on the right is the single thread topstitching that I had already done.

So the front of my pants is single-thread topstitched, and the back is double-thread topstitched. That's okay.
Another thing Angela talked about was using sandpaper and a hammer to buff the edges of the fabric to make them look worn, like storebought jeans look, rather than fresh and new like homemade jeans. You can see my efforts at that, above.
Here, for your viewing pleasure, is a shot of me wearing the pants that I tried my hand at altering. Since I had watched the section of the class on taking in the waist on a pair of pants, I went ahead and tried it.

These pants are what I bought at a thrift store in Colorado a couple of months ago. They seem to fit great when I first put them on, but then they gradually get bigger and bigger until they're falling off of me. I ended up taking off the waistband, the back belt loop, and unpicking the center back seam, then resewing it all back together to make the waist two (2!) inches smaller. I took in half an inch on each of the two darts--one at each pocket--and an inch (or more) at the center back. The pants stay up better now. And they're more comfortable. But that dart that extends behind the pocket makes the pockets a bit looser and stick out a bit, and I realize now that the pants are just overall too big for me.
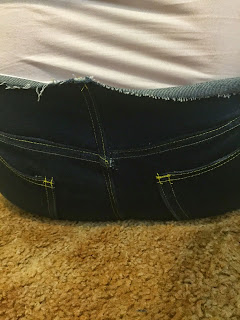
So I tried to apply what I learned to my jeans-sewing efforts. Here is the yoke sewn on, no waistband yet.

I don't know why it's so tall in the back. Did I sew it on upside down? Seriously, that yoke makes the back of the pants come up above my waistline--and these are supposed to be below-waist jeans to start with! Plus, did I mention that I already took out an inch in the rise of the front and the back? So why are they so tall?!
And the front still has some fitting issues.

Side view.

Oops! Look what I noticed. See this side seam, and how far it is from the front pocket to the back yoke?

And see this other side seam (the left?) and how much closer the two are to each other?

Yeah. Not good.
Another thing I noticed is that the left side seam seems to run down my leg just where it's supposed to, while the right one seems to sit to the back a bit.
So I unpicked and re-sewed another time or two.


Yeah. Not good.
Another thing I noticed is that the left side seam seems to run down my leg just where it's supposed to, while the right one seems to sit to the back a bit.
So I unpicked and re-sewed another time or two.


And I worked on getting the waist area tight enough to not fall down or droop.

When I sit down on the carpet, the back gapes open, so I took in that yoke by almost two inches.

And still, after 30 minutes of wearing, the back still falls down and bags in the seat area.

I'm not super-motivated to put on the waistband and finish these, as there are other projects I want to get started on. I'm thinking I need to pick out the seams again, maybe even take the back pockets off and cut off another inch or two of the back rise; maybe even adjust the front pockets and rise. I don't know. But I'll come back to it when I'm ready. Time to give it a rest.
What a lot of work. You have a figure a little like mine - small on the hips and larger tummy. I find that pants always slide down unless I anchor them firmly. I think you have done a wonderful job here in getting to this point, and I can understand why you want a break now - something a little more pleasurable is needed.
ReplyDeleteI love the double yellow stitching and the inside of the pockets. I agree, put then aside and work on something else for a bit.
ReplyDeleteI love the double yellow stitching and the inside of the pockets. I agree, put then aside and work on something else for a bit.
ReplyDeleteGreat job - it's hard to find jeans that fit perfectly. Harder yet to make them!
ReplyDelete